With docker there are two main ways to communicate docker with each other.
With using the links which configure the container with the environment variables and host entry that allow containers to communicate with each other.
Second is service discovery patterns that is Docker API.
The Service Discovery pattern is where the application uses a third party system to identify the location of the target service. for example, if our application wanted to talk to a database, it would first ask an API what the IP address of the database is.
This pattern allows you to quickly reconfigure and scale your architectures with improved fault tolerance than fixed locations.
The machine name Docker is running on is called docker. If you want to access any of the services, then use docker instead of localhost or 0.0.0.0.
Step 1 - Nginx Proxy
We want to have NGINX service running which can dynamically discover and update its load balance configuration when new containers are loaded.
Thankfully has already been created and called nginx-proxy.
Nginx-proxy accepts HTTP requests and proxy the requests to the appropriate container based on the hostname.
Three key properties Required to be configure when launching the proxy container.
The first is binding the container to HTTP port 80 on the host with using -p 80:80. This will ensure all HTTP requests are handled by the proxy.
The second is to mount docker.sock file. This is the connection of docker daemon running on the host, that allows containers to using its metadata via API. Naginx proxy uses this to listen for events and then updates Nginx configuration based on the container IP. Mounting file works same as mounting directories /var/run/docker.sock:/tmp/docker.sock:ro, Setting up :ro will restrict the access with readonly.
Finally we can set optional _-e DEFAULTHOST=<domain>. If Request come in and doesnt make any specified hosts then this is the container where the request will be handled. This enables you to run multiple websites with different domains on single machine with fallback to a known website.
Because we are using DEFAULT_HOST any request comes in that will be directed to the
container which contains the host proxy.example.
You can make a request to the web server usingcurl http://docker. As we have no containers,
it will return a 503 error.
Step 2 : Single Host
Nginx now listening to the events which docker raises on start/stop.
Starting container.
For Nginx-proxy to start sending requests to a container you need to specify the
VIRTUAL_HOST environment variable. This variable defines the domain where requests will
come from and should be handled by the container.
In this scenario we'll set our HOST to match our DEFAULT_HOST so it will accept all requests.
docker run -d -p 80 -e VIRTUAL_HOST=proxy.example test/docker-http-server
Here we are running container katacoda/docker-http-server that will running one website
for testing.
Step 3: Cluster
We now have successfully created a container to handle our HTTP requests.
If we launch a second container with the same VIRTUAL_HOST then nginx-proxy will configure the system in a round-robin load balanced scenario. This means that the first request will go to one container, the second request to a second container and then repeat in a circle. There is no limit to the number of nodes you can have running.
Task:
Launch a second container using the same command as we did before.
docker run -d -p 80 -e VIRTUAL_HOST=proxy.example test/docker-http-server
Testing:
If we execute a request to our proxy using curl http://docker then the request will be handled by our first container. A second HTTP request will return a different machine name meaning it was dealt with by our second container.
Generated NGINX Configuration While nginx-proxy automatically creates and configures NGINX for us, if you're interested in what the final configuration looks like then you can output the complete config file with docker exec as shown below.
b. Extract the .zip folder in your system. Go to the Bin folder and execute artifactory.bat
c. Go to the browser and visit localhost:8081 in order to visit to the artifactory in browser.
d. Log in as admin by providing the default credentials:
Username: admin
Password: password
e. You can create a Local repository to store package files created by the Jenkins/Maven project:
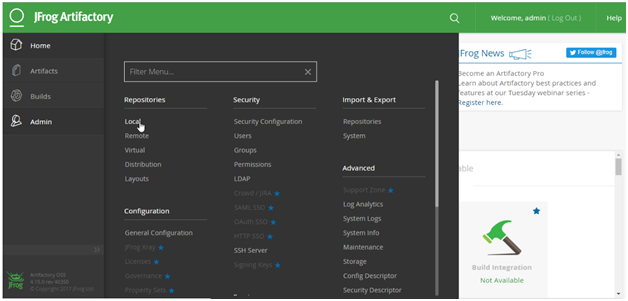
Go to Admin -> Repositories ->Local -> New
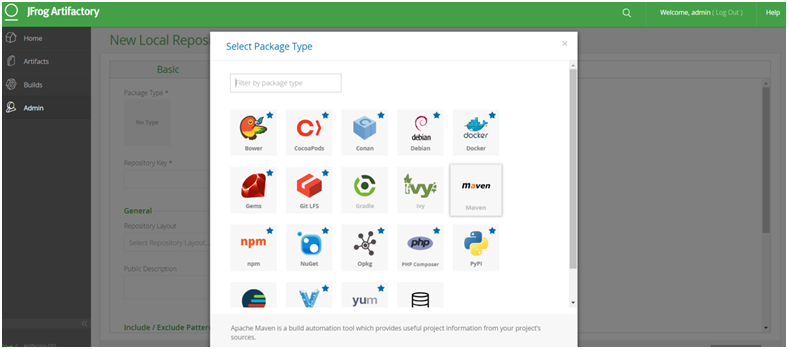
f. Select Maven
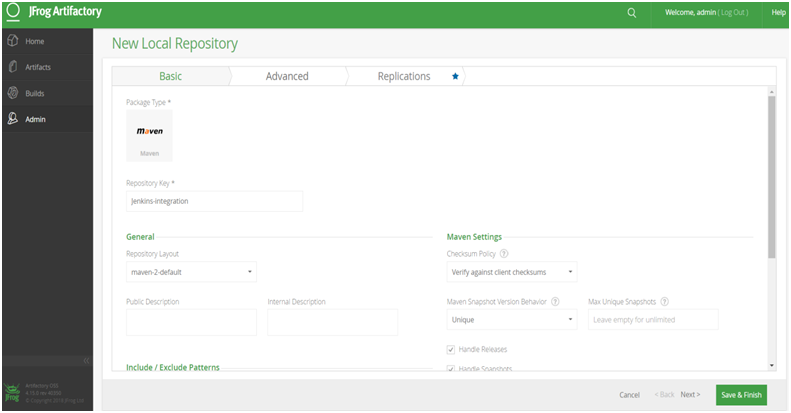
g. Provide key (name: Jenkins-integration) for your repository and check Handle Release and deselect Handle Snapshot.
h. Similarly create another local repository with key (e.g. Jenkins-snapshot) and check Handle Snapshot while deselecting Handle Release.
i.Create a user that you can utilize from Jenkins to access Artifactory:
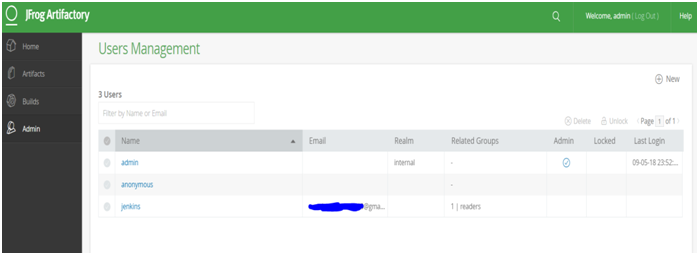
Go to admin -> Security -> users -> Click on NEW from Users management window -> Add new user->Save
Verify the list of users.
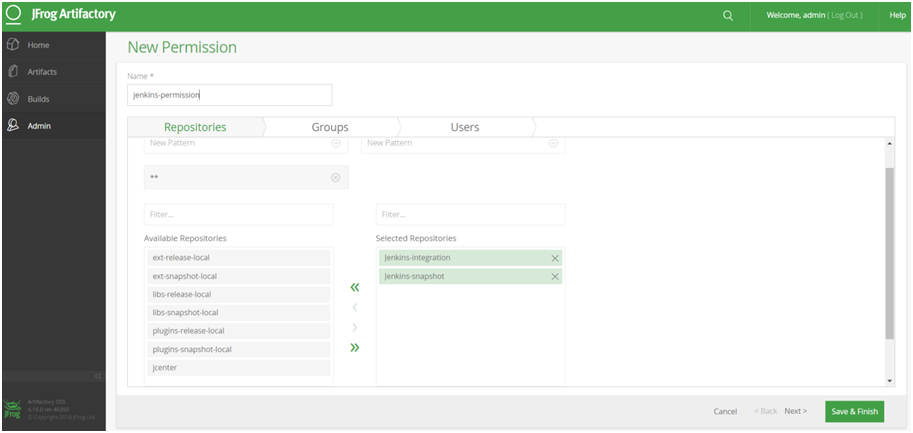
j. Provide the newly created user with permissions to the repositories:
Go to admin -> security-> users
- Give the name to the permission
- Choose the repositories on which you want to set the permission
-Click save & finish
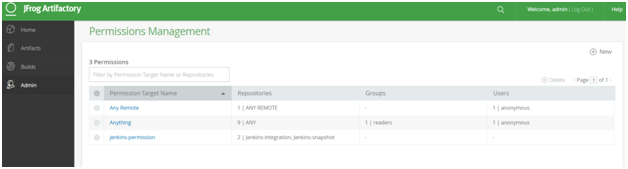
Check the Permissions Management section in Artifactory for recent changes:
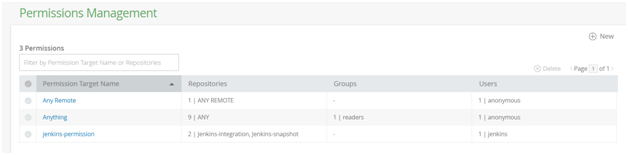
k. Edit the permission and assign the user:
Check the Permissions Management section in Artifactory for recent changes:
Now you are ready to integrate Artifactory with Jenkins.
2. Artifactory Plugin configuration in Jenkins
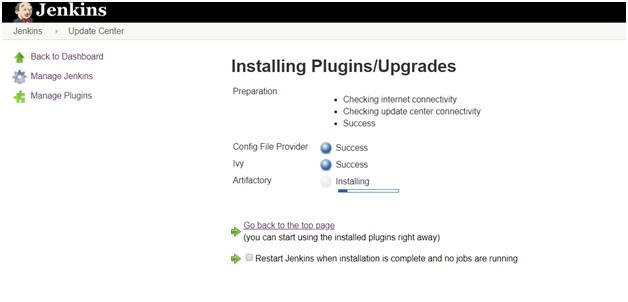
a. Go to Jenkins dashboard -> Manage Jenkins -> Manage Plugins -> Available -> Artifactory -> Install with restart.
b. Configure Artifactory-related settings in Jenkins:
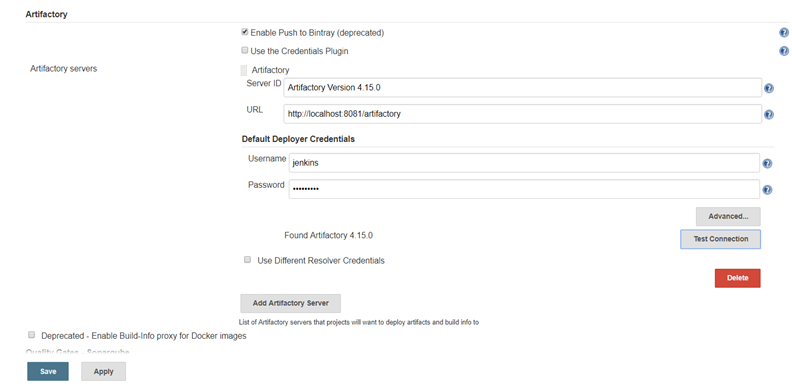
Go to Jenkins dashboard -> Configure System ->Artifactory section ->Add artifactory server -> provide the details -> Test the connection ->apply & save
c. Go to a Jenkins project that creates a package file after compiling all of the source files.
Go to Build Environment section -> Resolve artifacts from artifactory -> Click on refresh Repositories ->select the repository in release and snapshot field from the lists.
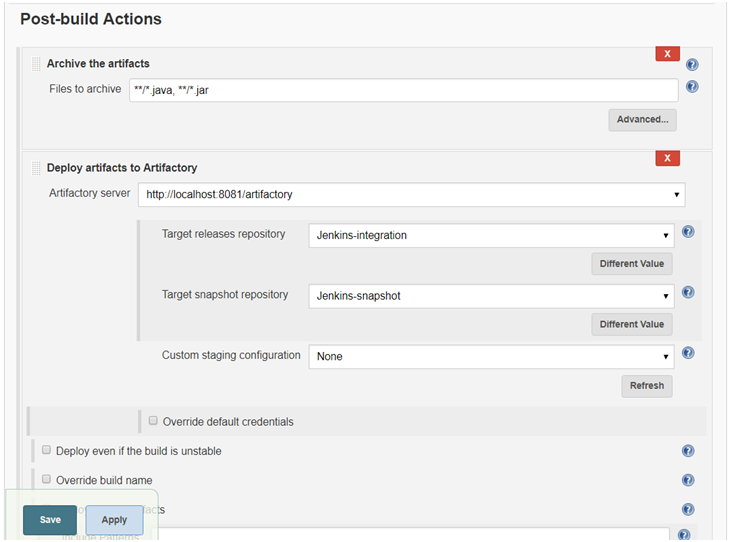
d. Go to Add post-build section ->select deploy artifacts to artifactory -> click on refresh -> choose the target releases and snapshot repository (repositories created earlier) ->save
e. Click on Build now and verify logs in the Console Output. Jar files are resolved from the local repository or Artifactory.
f. Once the package is created, it is stored in artifactory too. Go in the artifactory and check the package.